
Web Design Tutorial using Kompozer Download
A comprehensive web design tutorial in PDF format using the free web editor Kompozer powered by Mozilla, step by step instructions with screen shots in PDF or MS Word format.
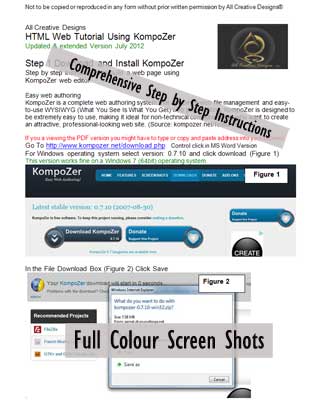
This tutorial does not require any prior knowledge of web editing or web coding and will enable you to build your own web page. The tutorial is laid out in easy to follow steps with the novice user in mind and features full color screen shots. It explains how to download the Kompozer web editor software, install and run it on your computer. Find full instructions to create a professional looking and full functional web page for the world wide web using Cascading Style Sheets.
Topics covered by this web page design tutorial
Step 1: Download and Install KompoZer
The KompoZer web editor is a free standing (also called portable) application, which means that files dont have to be installed into Windows program files and can be run from any folder on your computer or even your USB stick.
Step 2: Opening an existing HTML document in Kompozer
Step 3: Saving a new HTML document
Step 4: Creating a Banner using CSS Cascading Style Sheets.
A. Inserting a table
B. Saving a banner image
C. Inserting background image into table row using CSS (Cascading Style Sheets)
D. Applying your Style
E. Adding a Heading
F. Creating a CSS tag selector for Heading 1 (h1)
Step 5: Adding a Content Table
There is a choice of PDF or MS Word documents formats to download. Word document was created with MS Word 2007 in compatibility mode, use our PDF download if you are having problems with the word doc version.
All tutorials © 2019 All Creative Designs ® See Copyrights
Kompozer is a free download web editor powered by Mozilla.
KompoZer is based on Gecko, the layout engine inside Mozilla; it's a super-fast, very reliable, standards conformant engine maintained on a daily basis by a wide community of developers. (Source: .kompozer.net/features)
Download Kompozer Tutorial in MS Word .doc format 1.25 MB
Download Kompozer Tutorial in Adobe Reader .pdf format 5.47 MB
Expand the Tutorials Menu to access other Web Design and Image Edtiting Tutorials.
Back to Tutorials Main Page
All Creative Designs provide a Web Site Design and Development service with a difference and produce professional and innovative designs to your requirements. Every web site is unique and created without the use of pre-generated templates. We are developing interactive and informative web solutions for non-profit organisations by constructing dynamic member data bases with full administration functions. All Creative Designs services the Nambucca / Coffs Harbour area and NSW.
Tutorials, web designs and all images copyright ©2019 by www.allcreativedesigns.com.au world wide rights reserved.
ABN: 65869832328